Install Nutanix Community Edition (CE) Nested on VMware ESXi v6.7 Walkthrough – Part 1
Register on the Nutanix community site:
Go here:
https://next.nutanix.com/download-community-edition-15/download-getting-started-with-ce-5-10-24210
Download:
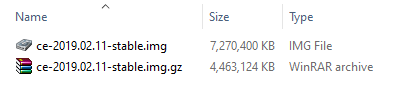
Disk Image-based Full Install
http://download.nutanix.com/ce/2019.02.11/ce-2019.02.11-stable.img.gz
Hash: 092a9b7042ea3168732c09d4df15293e
Check it!
Extract the file
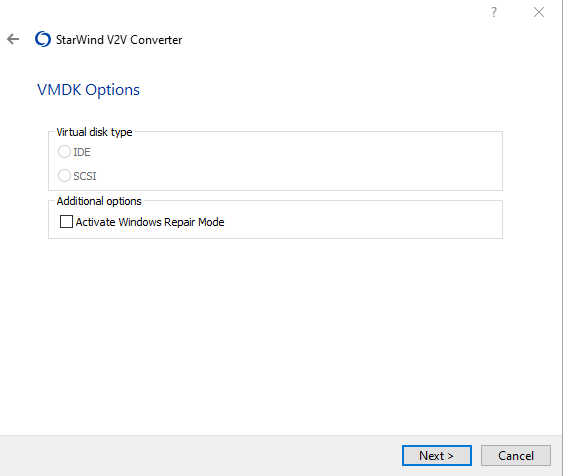
Install StarWind V2V Converter if you don’t have it.
-> Select Convert a local file
-> Browse to the .img file and then click Next.

You need to select a standard ESX server image .vmdk and not the growable one. I tried the growable one several ways and didn’t get it to work.
Notice that disk type is greyed out. That is okay.:
I suggest naming the file so that it matches the name of your virtual machine.

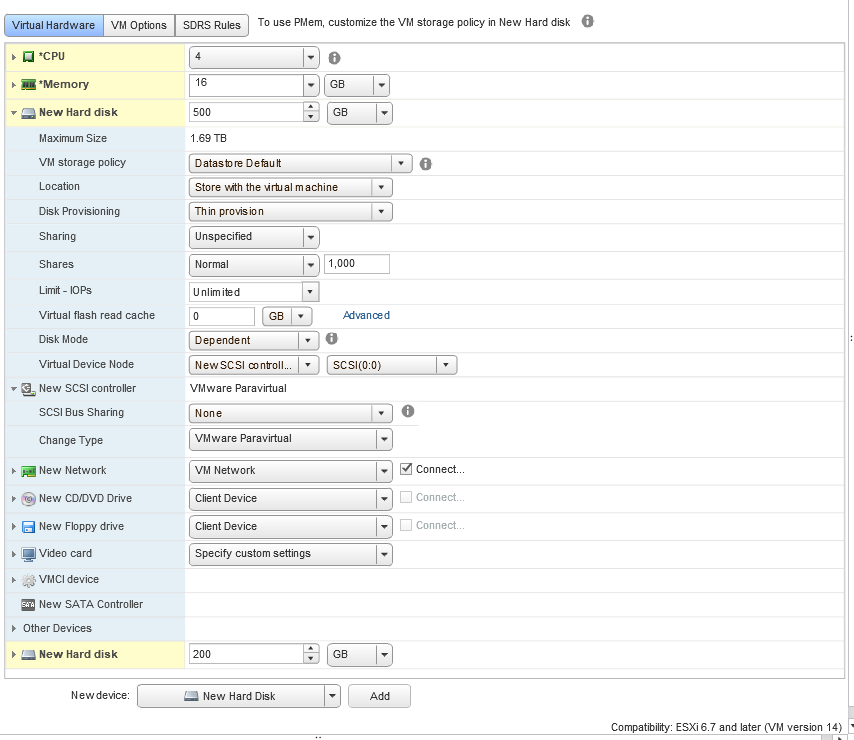
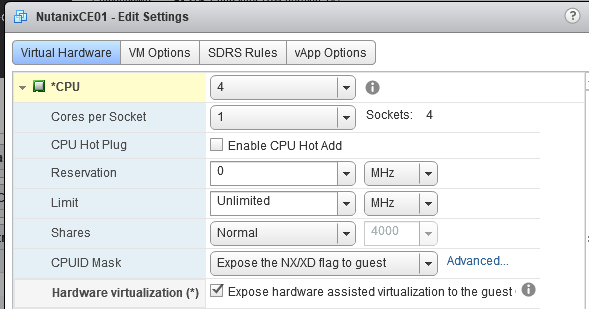
While it is converting, which will take a moment, go ahead and create the base VM. The following is the base configuration/minimum requirements:
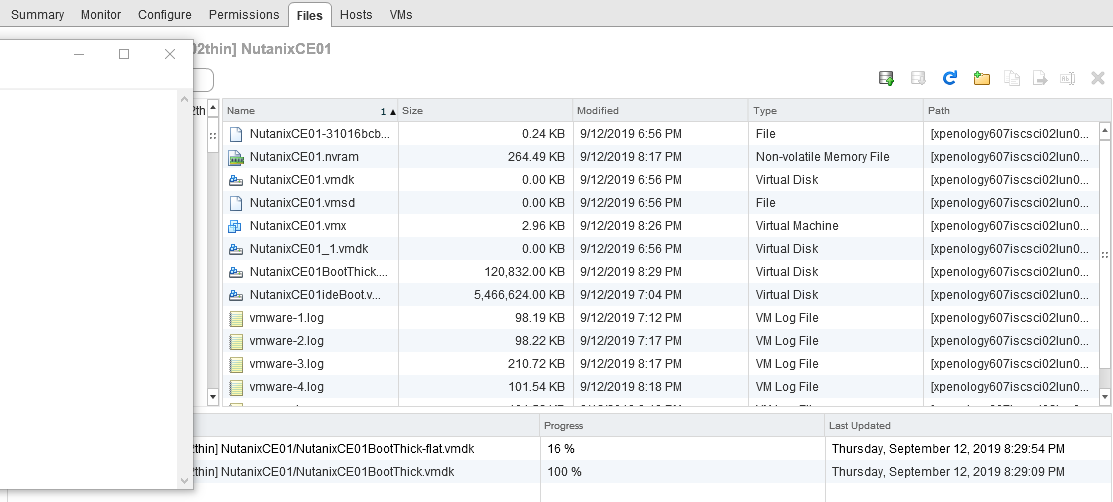
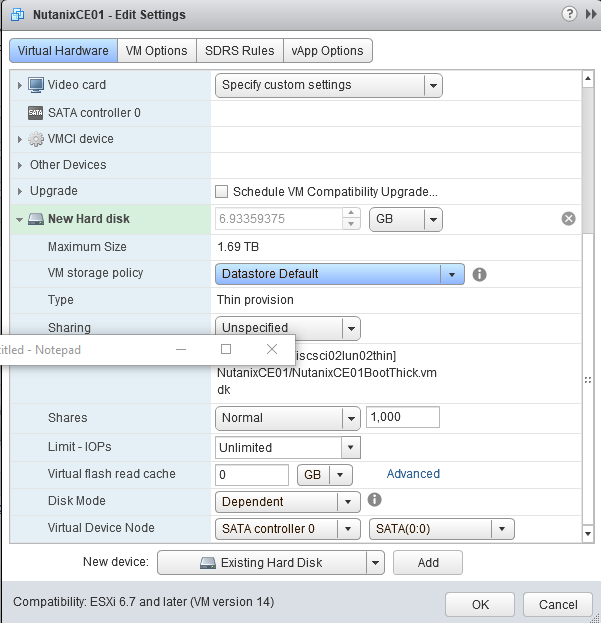
Create the VM, then go and upload the .vmdk and -flat.vmdk files to the folder on the datastore where the VM is located. You can see the remnants of some of my testing with converted growable .vmdks that I later removed from the datastore.
Make sure to Expose hardware assisted virtualization to the guest VM:
–> Add SATA Controller 0
–> Add an existing hard disk, point it to the recently uploaded .vmdk and then assign it to the SATA Controller at port 0:0.
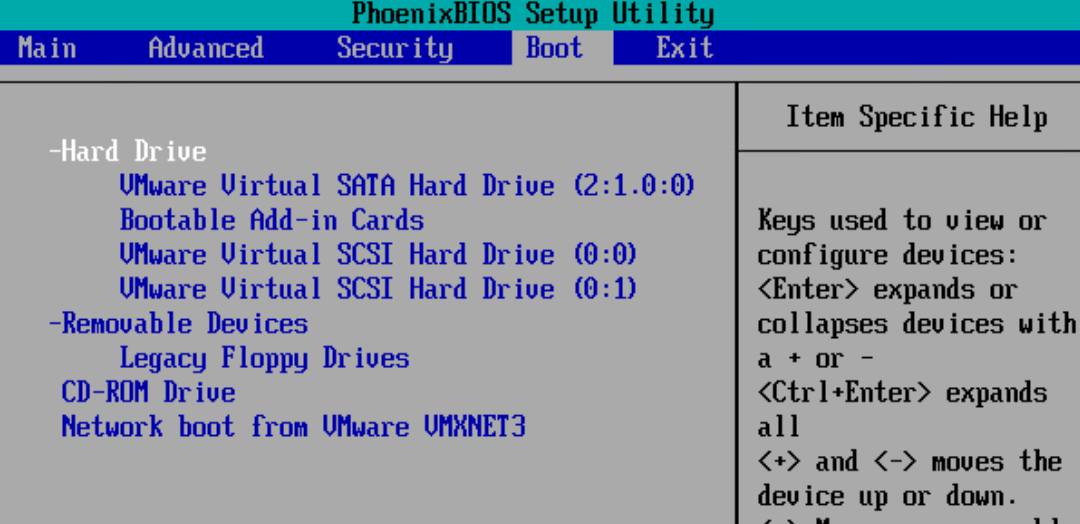
I changed my VM Firmware to BIOS and forced BIOS entry on next boot.

I modified the boot order:
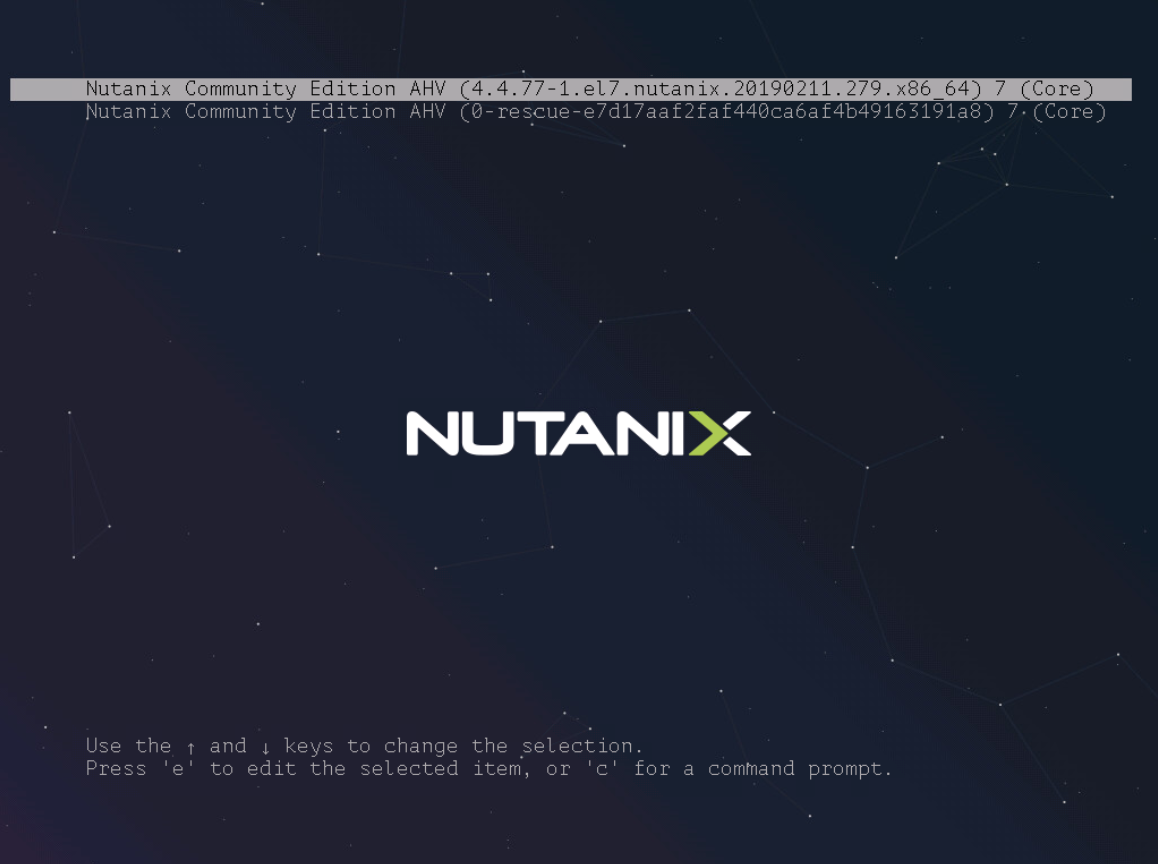
On the way to a successful install!
Stay tuned for part 2 when we continue the install…
Can you give more information on creating the base VM?
Do I use the wizard? What OS do I select? Other 64 bit?